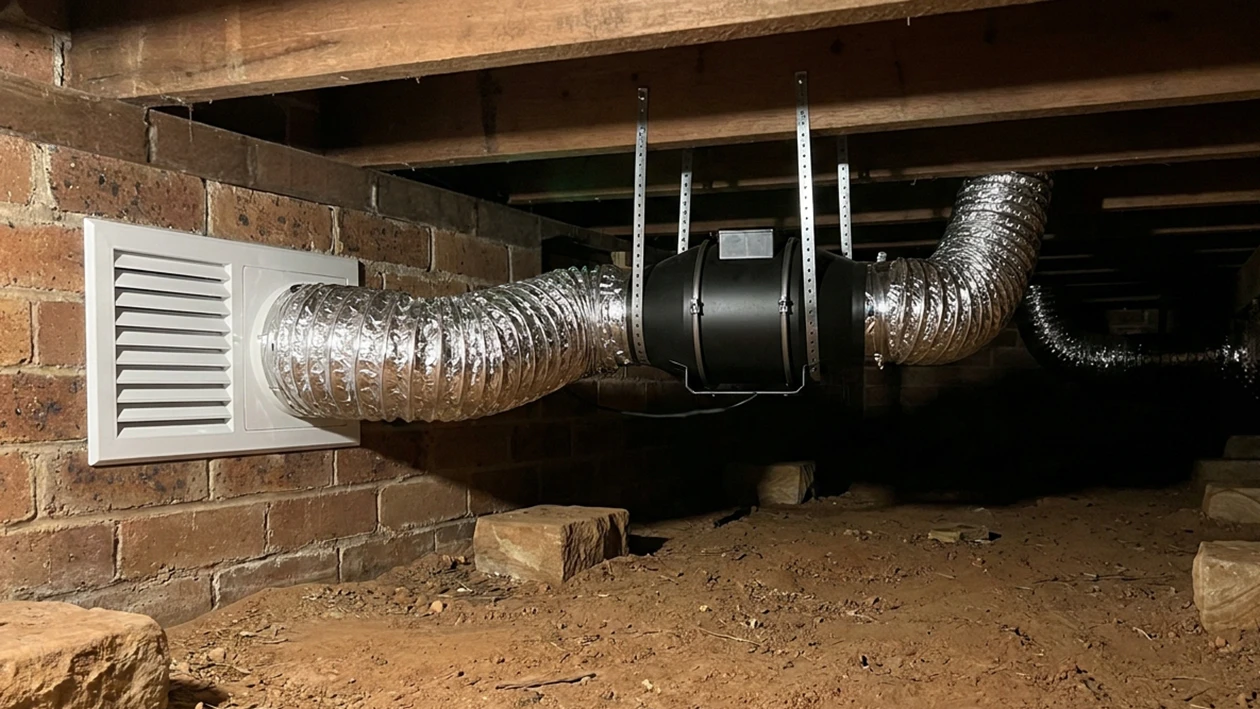
Subfloor ventilation is the airflow system beneath a suspended floor that stops moisture building up in the space between the ground and your floorboards. Yes, your subfloor needs it. Under the National Construction Code, a home with a suspended floor must have a minimum aggregate ventilation area based on the humidity of its location and the length of its external subfloor walls.
Work through the checklist and the calculation below. You will know two things by the end: whether your subfloor is putting the house at risk, and how many vents it should have.
If you own a pre-war home anywhere in the Inner West, this matters more than most. Federation and interwar houses in Five Dock, Haberfield, Leichhardt, Summer Hill and Marrickville sit on suspended timber floors over brick piers. Nearly all of them. They were vented to a standard set long before the current code existed, and decades of added paving, garden beds, decks and air conditioning units have blocked what little airflow they had.
What Are the Signs of Poor Subfloor Ventilation?
Poor subfloor ventilation shows itself upstairs first. Musty smells, cupping floorboards, damp lower walls. All of them appear well before timber decay becomes structural.
Self-assessment checklist
Tick every statement that applies to your home:
- A musty or earthy odour inside the house, strongest in rooms sitting directly above the subfloor
- Cupping, warping, springiness or squeaking in timber floorboards
- Visible mould or damp patches on the lower section of interior walls, or salt staining on external brickwork near ground level
- Condensation forming on windows in rooms with no obvious moisture source (no shower, no clothes drying, no unflued gas heater)
- Unexplained allergy or respiratory flare-ups that ease when you are away from the house
How to read your score
| Ticks | What it means | What to do |
|---|---|---|
| 0 to 1 | Monitor | Check vents are clear each season and re-test after heavy rain |
| 2 to 3 | Improvement needed | Run the calculation below. You are very likely under-vented |
| 4 to 5 | Critical | Get the subfloor inspected. Passive vents alone are unlikely to fix it |
Do this today
Take a torch and look through an existing vent, or enter the subfloor if there is safe access and clearance. You are looking for four things:
- Pooling or damp soil
- White powdery salt deposits on the brick piers and the low internal walls under the floor
- Dark staining or fungal growth on the bearers and joists
- Any vent that has been rendered over, buried by soil, or sealed behind a deck
Press a screwdriver into the underside of a bearer near a pier. If it sinks in easily, the timber is already decaying. That is a structural problem, not a ventilation one. Decayed bearers are the most common reason an older floor ends up out of level. The repair is set out in our guide to sistering joists and levelling an old floor.
How to Calculate Your Required Subfloor Ventilation
The NCC sets a minimum total vent opening area for every metre of subfloor wall, based on three broad humidity zones. For a home with bare soil under the floor, the requirement ranges from 2,000mm² to 6,000mm² per lineal metre. Sealing the ground with an impervious membrane, in practice a heavy plastic sheet laid over the dirt, halves it.
The code requirement
Table 6.2.1a, ABCB Housing Provisions (NCC 2022)
| Climatic zone | Minimum ventilation, no membrane (mm² per metre of wall) | Minimum ventilation, ground sealed with impervious membrane (mm² per metre of wall) |
|---|---|---|
| A | 2,000 | 1,000 |
| B | 4,000 | 2,000 |
| C | 6,000 | 3,000 |
Two things about that table. The zones are A, B and C, based purely on prevailing relative humidity. They are not the eight NCC energy efficiency climate zones people usually mean by “climate zone”. Sydney sits in Zone C, so the worked example below uses 6,000mm² per metre.
The code also sets minimum ground clearance: 150mm from the ground surface to the underside of the lowest horizontal subfloor member, rising to 400mm where a termite management system needs to be inspected.
The formula
(Total lineal metres of external subfloor wall × zone requirement) ÷ clear area per vent = number of vents required
Step 1. Walk the perimeter with a tape measure and record the total lineal metres of external wall enclosing the subfloor.
Step 2. Apply your zone figure. For Sydney with bare soil underneath, use 6,000mm² per metre.
Step 3. Find the clear area of your vents. This is the critical step almost everyone gets wrong. A vent’s clear area is the actual open airflow area after louvres, grilles and mesh are deducted, not the size of the hole in the wall. It is stated on the manufacturer’s data sheet.
| Vent type | Typical clear area |
|---|---|
| Standard terracotta air brick | approx. 4,000 to 5,000mm² |
| Galvanised or brass punched grid vent | approx. 5,000 to 7,000mm² |
| High-flow louvred vent | up to approx. 12,000mm² |
Worked example: a 40 metre perimeter in Five Dock
Required area: 40m × 6,000mm² = 240,000mm²
Using terracotta vents at 4,500mm² clear area each: 240,000 ÷ 4,500 = 54 vents
Most Federation-era homes we open up have between eight and twenty. That gap is the entire problem, and it explains why a house can look perfectly well built and still smell damp in July.
The standard has moved, twice
That gap is not builder negligence.
| Year | Requirement | Source |
|---|---|---|
| 1974 | 1,400mm² per metre | New South Wales specification of the day |
| 1974 | Up to 10,600mm² per metre | Light Timber Framing Code |
| 1996 | 7,300mm² per metre, one figure nationwide | Building Code of Australia |
| 1999 to today | 6,000mm² per metre in the highest humidity zone | National Construction Code |
Both 1974 figures were recorded by E.W.B. Da Costa in a CSIRO Forest Products review of subfloor ventilation, cited in Williamson and Delsante, Architectural Science Association, 2006. A house vented to the NSW figure of the day carries less than a quarter of the opening area Sydney requires now.
The climate based zones only arrived in 1999, following CSIRO research by I.S. Cole. Which leaves an odd result. A house built to the 1996 code carries more subfloor ventilation than today’s minimum for the highest humidity zone.
The membrane shortcut
Now run the original example with an impervious membrane laid over the soil: 40m × 3,000mm² = 120,000mm², or 27 vents.
Sealing the ground halves the vent count you need. On a heritage facade, where cutting fifty new openings would wreck the brickwork, that is often the only workable path.
Try this now. Count your existing vents. Multiply that number by 4,500. If the result is lower than your perimeter in metres multiplied by 6,000, your subfloor does not meet current requirements.
Why vent area and actual airflow are not the same thing
There is a second variable the code table does not account for, and on Inner West blocks it matters enormously. Vents only move air when wind drives it through them, and how much wind reaches your subfloor depends on how sheltered the site is.
Research by Terry Williamson at the University of Adelaide and Angelo Delsante at CSIRO put numbers on this. Their model treats a sheltered inner-city site as receiving a small fraction of the wind a rural one gets. The shielding factors are 0.18 for exposed rural, 0.10 for average suburban, and 0.03 for sheltered city centre.
A tightly built terrace or semi, hemmed in by neighbouring walls, paling fences and a narrow side setback, can be drawing roughly a third of the airflow the same vents would deliver on an open suburban block. The vent area on paper is identical. The air movement is not.
That means two things for older Inner West homes. Meeting the code minimum on a heavily sheltered site is a floor, not a comfortable margin. And clearing obstructions will often buy more real airflow than cutting new openings. The fence panel sitting flush against the wall. The garden bed built up over the vents. The condenser boxing in the side passage.
Troubleshooting: internal walls are blocking the airflow
Vents on the outside only work if air can move across the whole space. The internal brick walls under the floor, called dwarf or sleeper walls, need openings with an unobstructed area equivalent to the adjacent external openings, or the far corners of the house become dead air pockets. In double leaf masonry, openings must be provided in both leaves and aligned so air passes straight through.
Where the ground or subfloor is excessively damp, has a high water table, drains poorly or floods, the code requires the ventilation to be increased by 50% or other measures to be taken.
Is Subfloor Ventilation Worth It? Costs Compared
Yes, and the maths is not close. Ventilation work is one of the cheapest structural interventions available, while replacing decayed bearers and joists means lifting floors and propping the house.
| Option | Indicative cost | Best suited to |
|---|---|---|
| Passive vents (supply and install) | $15 to $40 per vent, plus labour | Homes with reasonable cross-breeze and a modest shortfall |
| Impervious ground membrane | $1,500 to $3,000 | Damp soil, poor drainage, or facades where cutting more vents is not viable |
| Mechanical extraction system | $600 to $1,500 installed | Dead air pockets, blocked cross-flow, persistent high moisture |
Which one do you need?
- Standing water, heavy mould growth, or timber already showing decay: mechanical extraction plus a ground membrane, and a structural inspection first
- Musty smell, clearly too few vents, otherwise dry soil: add passive vents, and reassess in six weeks
- Enough vents on paper but the middle of the house is still damp: the problem is cross-flow, not vent count. Open up the internal dwarf walls
- Heritage-listed or conservation-area facade: membrane first, because it halves the number of openings you need to cut
- Sheltered site with neighbours close on both sides: clear the obstructions first, then reassess before cutting anything
How to Install Subfloor and Telescopic Vents
Installing a vent means cutting out a brick, clearing the cavity, fitting the vent and re-mortaring the perimeter so it is secure and vermin proof. Telescopic vents extend to suit the thickness of a cavity wall.
- Mark the spacing. Space insertion points roughly 1.5m to 2m apart based on your calculation, and keep vents within about 600mm of each corner so air does not stall there. Prioritise opposing walls, since a run of vents down one side of the house creates no cross-flow at all.
- Check what you are cutting into. Stay clear of lintels, openings, and any point carrying concentrated load. On double brick, both leaves need aligned openings. If you are unsure whether the section is load bearing, stop and get advice.
- Cut and remove the brick. Use an angle grinder with a masonry blade to cut the mortar joints around the target brick, then chisel it out cleanly.
- Clear the cavity. Remove mortar droppings and debris so the interior face of the opening is not choked. On many older homes this alone restores a surprising amount of airflow.
- Fit the vent. Slide telescopic units together to match the wall thickness, then insert.
- Seal. Re-mortar around the perimeter. Fit vermin-proof mesh, and remember that finer mesh reduces clear area, so size your vent count on the stated clear area, not the opening size.
Check your own work
On a bright day, look at the new vents from inside the subfloor. You should see clear daylight and feel air movement. If you see light but feel nothing, you have openings without cross-flow, and the fix is internal, not external.
The mistake we see most often
Vents installed too low. The code requires 150mm minimum clearance to the underside of the lowest subfloor member, and vents sitting near or below external ground level will take in surface water every time it rains. On sloping Inner West blocks this catches people out constantly, because the ground level at the rear of the house has crept up over the years with landscaping. Before you cut a single vent, check whether the actual fix is regrading the soil away from the wall.
Two other cautions. SafeWork NSW advises that homes built before 1990 are likely to contain asbestos, and subfloor sheeting, pipe lagging and ducting are common places to find it. You must use a licensed removalist for any amount of friable asbestos, or for more than 10 square metres of non-friable asbestos. Subfloor spaces with low clearance are also confined spaces with real risks.
What to Do Next
If you have added passive vents and the cupping floors, mould and musty smell have not improved after four to six weeks, passive airflow is not going to solve it on its own. The next step is a mechanical subfloor extraction system, usually paired with a ground membrane so the fan is not fighting a constant supply of soil moisture.
If the diagnostic checklist scored four or five, or a screwdriver went into a bearer, treat it as a structural matter first. Ventilation stops further decay. It does not restore timber that has already gone, and at that point you are looking at a home renovation rather than a repair.
Jonathan has been under a lot of these houses. Heritage restoration is core work for us, including mould, lead and asbestos management on older properties, and Jonathan runs every job himself from the first inspection through to handover. Every project carries a 7-year structural warranty that exceeds industry standards. We are a Master Builders Association member with a 5.0 star Google rating.
Call Jonathan for a consultation, or book an inspection online. Licensed builder 359604C.